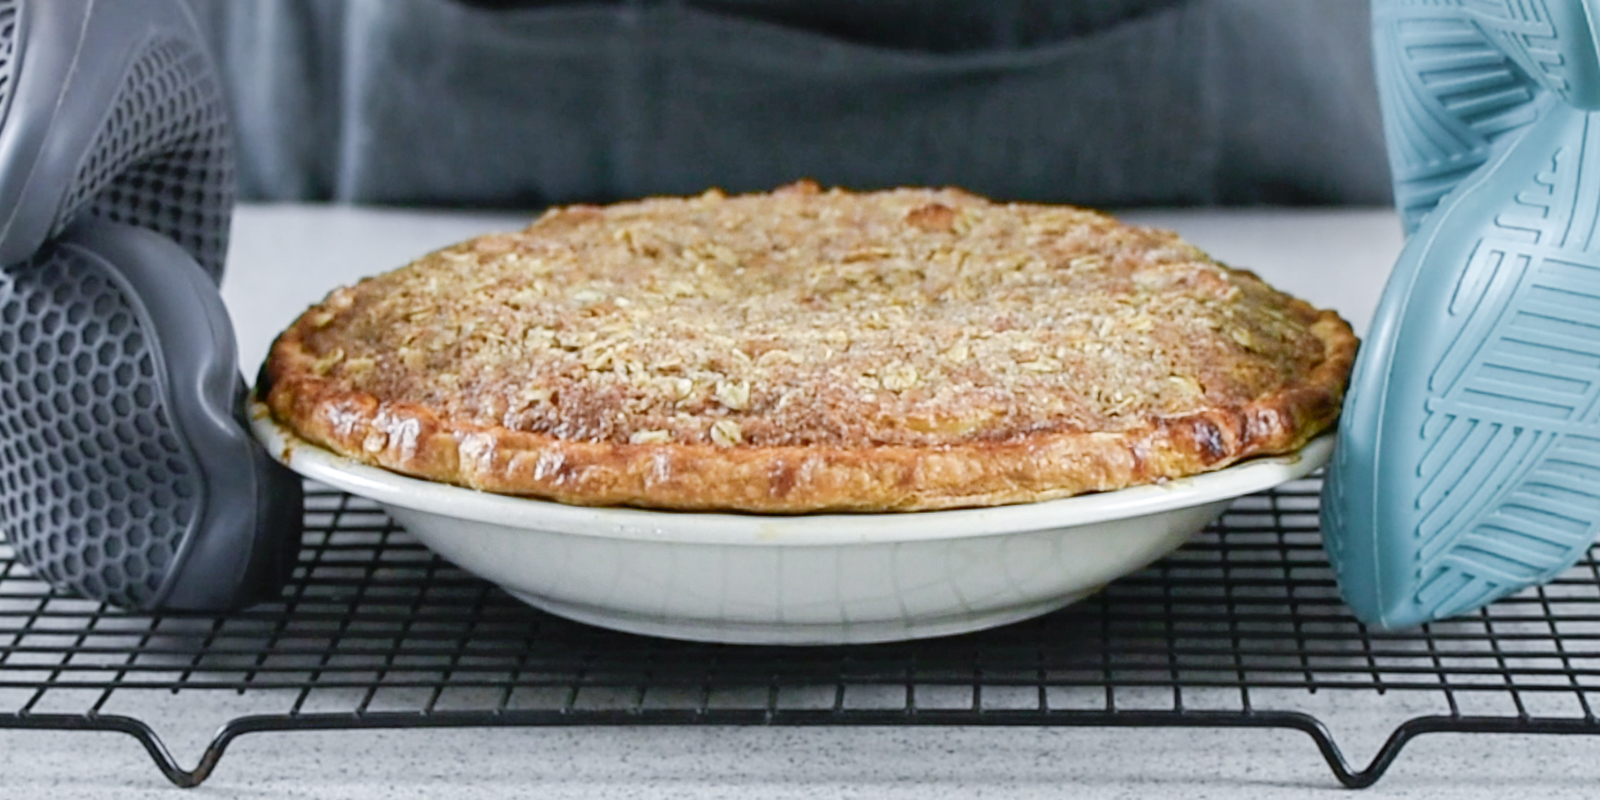
A great pie crust recipe should be easy to follow and have no more than six ingredients. To illustrate that point, I’ve included my Perfect Pie Crust recipe which makes a double crust. This one is buttery, pliable, and best of all–forgiving (more on that later). Before you start, though, check out the following five tips I live by when preparing pie crust from scratch.
Tips for Making the Best Pie Crust Recipe
#1: Keep the water and fats cold. ❄️
The goal is to keep the butter as cold and solid as possible while forming and working with the dough. If the butter warms up too much, it will melt into the crust as it bakes. Cold butter, on the other hand, will stay in small, solid chunks throughout the dough when mixed correctly. Once the dough is in the oven, the cold butter creates steam as it melts resulting in layers of flaky texture.
Some suggestions:
- Before you prep any other ingredients, measure out the shortening. Next, measure out the butter and cut it into 1″ chunks. Place the butter and shortening in the freezer until they are extra chilled but not frozen. Only pull them out when ready to use in the recipe.
- Use only ice water that has had a chance to chill to 32°F: fill a glass with ice, pour cold water into it, wait 3-5 minutes, and it should be ready to use.
- Refrain from handling the dough excessively, or the butter will be in trouble as it becomes sticky and warm. If this happens, place the dough in the freezer for 10 minutes or refrigerator for 20 minutes before continuing with the recipe.
#2: Use only as much flour as is necessary. ⚖️
There are two points where flour will come into play: when you’re forming the dough and when you’re rolling it out.
When you first form the dough: It should feel a little tacky–not sticky. If it feels sticky, evaluate whether the dough is a) overhydrated OR b) too warm (and consequently, the butter is too warm). If overhydrated, add 1 Tbsp of flour to the dough and mix until just combined. Repeat as necessary, but don’t go nuts. If too warm, refrigerate the dough for 20 minutes or freeze it for 10 minutes before continuing with the recipe.
When rolling out the dough: Lightly sprinkle the rolling surface, rolling pin, and the top of the dough with flour. After 2-3 rolls, check the underside of the dough to see if it is sticking, and sprinkle a little more flour underneath If so. If the dough gets sticky as you roll it out, lightly flour the rolling pin again before continuing. If the problem persists, refrigerate it for 20 minutes or freeze it for 10 minutes before continuing with the recipe.
- You can also roll the dough between two sheets of parchment paper. I will admit that I prefer a different approach because the dough can stick to the parchment, so flour is still needed to some extent. And unless you anchor the parchment paper, it’ll move around as you roll it–SO annoying. I use a rolling mat with a porous surface instead, which has fewer contact points for the dough to stick to, resulting in less flour being used.
#3: Be cautious not to overmix the dough. 👨🍳
Like adding too much flour, overmixing the dough will result in a thick, cracker-like crust. As flour and moisture combine, gluten strands form, making the crust tough, not tender. Overmixing the dough will also warm the butter, so you’ll lose out on flaky layers (see #1). Pull the dough out of the food processor as it starts to form, even if it still looks crumbly. I pour it onto a piece of plastic wrap and use the wrap to press and shape the dough into a disc. The dough will hydrate more in the refrigerator when resting.
#4: Add the flour and fat in batches. 🧈
To get an evenly flaky crust, don’t cut the butter, shortening, and flour together all at once. I start with half the flour and all of the shortening. Once blended, I add the rest of the flour and the butter and continue. Adding everything all at once not only lends itself to overmixing the dough, especially if you’re using a food processor. An overloaded food processor must work twice as hard to get to all the ingredients, and the butter won’t be broken into uniform solid bits.
#5: Allow adequate refrigerated rest periods. 😴
Besides keeping the butter cold, refrigerating the dough after it forms will allow it to become fully hydrated. It is standard to allow the dough to rest for 30 minutes in the refrigerator before rolling it out. It is also a good idea to place the dough back into the fridge after it is rolled out. Typically, I’ll refrigerate my dough for 30 minutes, roll it out, assemble the pie, and refrigerate for 15-30 more minutes before baking.
Check out my FAQ page for additional baking tips, such as oven temperature and calibration, measuring dry ingredients, and more!
What Makes This Pie Crust So Forgiving?
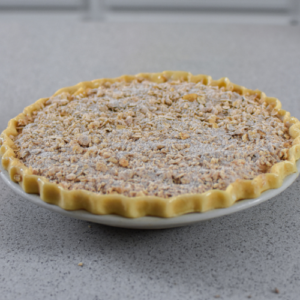
This dough can take a beating thanks to the small amount of shortening added. It is just enough to make it pliable and easier to roll out than a standard all-butter crust, but without the greasy mouthfeel of an all-shortening crust. The small amount of shortening also helps the crust hold its shape since it has a higher melting point than butter, which is excellent if you add any decorative touches. Shortening was a bad word in my family for a while, but I’ve found some options without trans fats or a combination of multiple oils such as this brand. [Please note that I am neither affiliated in any way nor make any purchase commissions from Amazon or the brand referenced.]
To illustrate why I find this crust so forgiving: Once upon a time, I was rolling out dough when I noticed it was particularly sticky and tricky. I looked over to see that I only added HALF OF THE FLOUR but ALL of the fat when I mixed the dough. Rather than toss it all out and start over, I threw everything back into the food processor for a few quick pulses before refrigerating the dough and rolling it out again. The end result? Sure it was a bit less flaky when baked into a pie, but the flavor and tenderness were still there. I even got compliments from it, which I was certain wouldn’t be the case. However, when it is made following the tips above and without error, the compliments flow much more.
Perfect Pie Crust
Equipment
- Food Processor recommended, but can use a pastry cutter
- Parchment Paper or Rubber Mat optional for rolling out dough
- Rolling Pin
- Rubber Spatula
- Measuring Cups/Spoons
- Scale optional if weighing ingredients
- 9" to 10" Pie Plate standard or deep dish
Ingredients
- 2 ½ Cups + 2 Tbsp All Purpose Flour 315g
- 1 ½ Tbsp Powdered Sugar 12g
- 1 ¼ Tsp Kosher Salt 7.5g
- ¼ Cup Shortening 51g
- ¾ Cup Unsalted Butter 170g - very cold, cut into cubes
- 6-8 Tbsp Ice Water 88-113g
Instructions
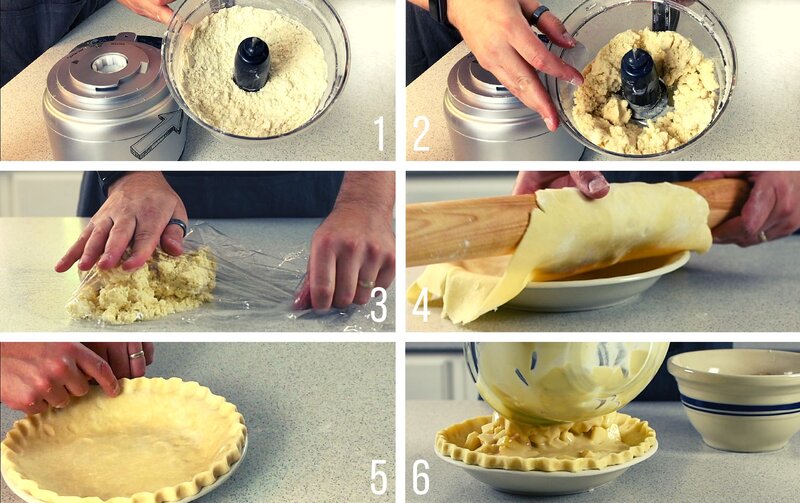
- In a small bowl, combine powdered sugar and salt. In a medium bowl, add flour and the sugar/salt mixture. Whisk about 10 seconds to combine.
- In the container of a food processor, add ½ of the flour mixture. Add shortening—pulse 5 times to combine. When pulsing, only do so for 1-2 seconds at a time.
- Add the remaining flour mixture to the food processor. Add butter, distributing evenly. Pulse 10 times to combine. Open the lid, check for large butter chunks, and redistribute before pulsing 2-3 additional times. The mixture should appear crumbly with small, pea-sized pieces or smaller.
- Add 4 tbsp of ice water to the food processor—pulse 5 times to combine.
- Add 2 tbsp of ice water to the food processor—pulse 5 times to combine. A dough should form, and you should be able to squeeze a pinch of it without it falling apart. If a dough has not developed, add 2 tbsp additional ice water and pulse 5 times.
- Pour dough onto a piece of plastic wrap, and--using the wrap to separate your hands from the dough--form a disc shape. Open the wrap back up.
- Cut the dough in half, and wrap each tightly with plastic wrap. Refrigerate for 30 minutes before rolling out. This recipe makes two crusts, so only roll out what is needed.
- Place dough on a lightly floured surface, and sprinkle the top of the dough with flour. Flour your rolling pin as well.
- Roll dough to 12"-13" diameter for a 9"-10" pie plate, respectively. Be sure to add a sprinkling of flour under each side of the dough midway through rolling so it doesn't stick to the surface.
- Place the rolling pin across one side of the dough, and lift the edge of the dough onto the pin. Continue rolling toward the center of the dough as you lift it off the surface, and unroll the dough onto the pie plate, being sure to center it. Refer to your specific scenario (A, B, or C) below for next steps.
A) If your pie recipe calls for blind-baking a single crust
- Preheat the oven to 425°F / 218°C.
- Once rolled out and placed on the pie plate, gently lift around the edges of the dough so that the center becomes flush with the inner side. Press the dough gently against the sides with the back of your hand as needed to remove any air pockets.
- Cut any excess dough drooping over the edges, leaving a ½" overhang. If crimping the dough, roll the overhanging dough under itself so that the edge of the dough is flush with the edge of the pie plate.
- Place two fingers or knuckles from one hand on the outer side of the edge, and ready your index finger on the inner side of the border. Press the dough with your index finger into the crevice between your fingers or knuckles. Repeat as you rotate the pie periodically (see the video for the crimping technique). Chill for 30 minutes.Please note that overworking your dough, adding too much water, or not chilling the dough long enough may prevent the crimp from staying in shape.
- Remove the pie shell from the refrigerator. If using an egg wash, lightly brush it on with a pastry brush. Line the inside of the pie dough with parchment paper or foil, and add pie weights (dried beans, uncooked rice or quinoa, or manufactured). See notes.
- Bake with pie weights for 8-10 minutes; the edges should turn lightly golden brown. Remove the pie weights carefully and continue baking for 5-8 minutes so that the inner side sets. See Notes.
- Let the pie crust cool for 10 minutes on a rack before using.
B) If your recipe calls for an unbaked, single pie crust
- Preheat your oven to your pie recipe's specifications.
- Once rolled out and placed on the pie plate, gently lift around the edges of the dough so that the center becomes flush with the inner side. Press the dough gently against the sides with the back of your hand as needed to remove any air pockets.
- Cut any excess dough drooping over the edges, leaving a ½" overhang. If crimping the dough, roll the overhanging dough under itself so that the edge of the dough is flush with the edge of the pie plate.
- Place two fingers or knuckles from one hand on the outer side of the edge, and ready your index finger on the inner side of the border. Press the dough with your index finger into the crevice between your fingers or knuckles. Repeat as you rotate the pie periodically (see the video for the crimping technique). Chill for 30 minutes.Please note that overworking your dough, adding too much water, or not chilling the dough long enough may prevent the crimp from staying in shape.
- Remove pie shell from refrigerator. If using an egg wash, lightly brush it on with a pastry brush. Next, add your filling, and bake according to your pie recipe's instructions.
C) If your recipe calls for a double crust
- Preheat your oven to your pie recipe's specifications.
- Once the first raw crust is rolled out and placed on the pie plate, gently lift the edges of the dough so that the center becomes flush with the inner surface. Press the dough gently against the sides with the back of your hand as needed to remove any air pockets.
- Roll out the second dough following the same method above.
- Add the filling to the pie plate. Place the rolling pin across one side of the dough, and lift the edge of the dough onto the pin. Continue rolling toward the center of the dough as you lift it off the surface, and unroll the dough onto the filling, lining up the edges of the dough with the base crust as much as possible.
- Cut any excess dough drooping over the edges, leaving a ½" overhang. If crimping the dough, roll the overhanging dough under itself so that the edge of the dough is flush with the edge of the pie plate.
- Place two fingers or knuckles from one hand on the outer side of the edge, and ready your index finger on the inner side of the border. Press the dough with your index finger into the crevice between your fingers or knuckles. Repeat as you rotate the pie periodically (see the video for the crimping technique). Chill for 30 minutes.Please note that overworking your dough, adding too much water, or not chilling the dough long enough may prevent the crimp from staying in shape.
- Remove the pie from the refrigerator, and cut three 1" holes in the center to vent. If using an egg wash, lightly brush it on with a pastry brush. Bake the pie according to your pie recipe.
Video
Notes
- Be sure to wrap the pie dough tightly in plastic wrap before refrigerating.
- When ready to roll out, let sit at room temperature for 10-15 minutes before beginning.
- If it starts to crack once you start rolling, allow for a few more minutes of exposure to room temperature before continuing.
- Be sure to wrap the pie dough tightly in plastic wrap, and then place the wrapped dough in a tightly closed freezer bag.
- When ready to roll out, let sit at room temperature for 10-15 minutes before beginning.
- If it starts to crack once you start rolling, allow for a few more minutes of exposure to room temperature before continuing.
- If you notice any dough sticking to the parchment or foil (or pie plate, if used as a weight), continue baking for an additional 3 minutes before trying again to remove the weights. Then proceed with the recipe steps.