Homemade pizza dough is so easy, so why are you opting for takeout? This recipe is knead- and no-knead friendly and includes a hearty San Marzano sauce to boot! The garlic and basil additions to this dough recipe create a flavorful combination that pairs well with many toppings. However, if your flavor is plain dough, this recipe has you covered since it tastes great either way! Try my topping suggestions if you want ideas to make a classic pizza the whole family will enjoy.
Why Making Homemade Pizza Dough is Easy
- It takes only a small handful of ingredients to pull off a great-tasting dough. The trick is in the technique.
- I’ve made homemade dough hundreds of times, trying different techniques, pans, and ingredients. We are a pizza family (understatement), so let me take the guesswork out of the equation.
 Kneaded Pizza Dough
 Kneaded Pizza Dough
Kneading is a technique that involves repeatedly pressing, folding, and stretching the dough to develop gluten proteins. Gluten provides the structure and elasticity needed for a good pizza dough, giving it the proper structure and texture. This doesn’t sound very easy, but I promise this homemade pizza dough is easy to knead and shape if you follow my instructions.
Pros
- Faster Gluten Development: No need to wait 24 hours, so if you’re planning tonight’s dinner–kneading is the way to go.
- Consistent Texture: Kneading helps to ensure that the dough has a uniform texture, making it easier to handle and shape.
- Better Rise: Kneaded dough is more likely to rise well in the oven, giving your pizza a fluffy, crusty texture.
Cons
- Time-Consuming: The kneading process for this recipe takes 5 minutes, but some recipes go even longer, over 10 minutes. There is such a thing as over-kneading the dough, and 5 minutes is a good balance.
- Physical Effort: Kneading by hand requires manual effort, which can be both a challenge and therapeutic experience.
- It Seems Intimidating: Kneading may be a bit intimidating if you are new to making pizza dough, but I write “seems” for a reason. There is nothing to be intimidated by! Check out the simple method in the next section, and follow the visuals.
Kneading Method
- Shape the dough into a rectangle, with the short end facing you. Grab the edge of the dough farthest from you.
- While pressing gently down on the center of the dough, pull the far edge and place it on top of the end closest to you, essentially folding the dough in half.
- Press the seam gently together with the palms of your hands.
- Rotate the dough 90°.
- Repeat, pulling the far end of the dough and placing it on top of the end closest to you. Press the seam gently together with the palm of your hands. Repeat steps 2-4 for five minutes; the dough should spring back when you press on it at this point, and it should feel tacky but not stick to your hands.
- Once kneaded, use the outer edges of your hands to shape the dough into a ball while rotating the dough and pressing gently into its base. The dough should tighten with each rotation until it becomes relatively smooth.
Tips for Making Homemade Pizza Dough Easy, the Kneaded Way
- Please keep your hands lightly floured as you work with the dough, especially at the beginning of the kneading process, since it will be sticky.
- If your hands get covered in too much dough, rub your hands together with some flour (a flour wash) to remove the dough parts.
- I like to sprinkle extra flour on the sidelines of my work surface for quick access.
- With this recipe, you should not add more than 2 Tbsp of flour to the dough during the kneading process to achieve 75% hydration.

Using a Stand Mixer Instead
You can knead the dough with a stand mixer by following these steps:
- Make a shaggy dough following the recipe.
- Add the dough to the bowl of a stand mixer fitted with the hook attachment.
- Turn on low speed for 1 minute.
- Add 1 Tbsp of flour, and turn the stand mixer onto medium speed for four additional minutes.
- Add 1-2 Tsp of flour to a clean work surface, and scrape the dough onto it. With floured hands, shape the dough: use the outer edges of your hands, gently press into the base of the dough on all sides, rotate, and repeat until a ball forms. Continue with the recipe as stated.
No-Knead Pizza Dough
No-knead dough, as the name suggests, does not require kneading. Instead, the dough is mixed in a bowl and left to rest for an extended period, usually up to 24 hours. During this time, the gluten develops naturally, and the dough becomes elastic.
Pros
- Effortless: No-knead dough is straightforward to make. There is no KNEAD for kneading (see what I did there?), so it is much easier on the arms and hands.
- Short Prep Time: This dough comes together in minutes, requiring only a few essential ingredients and a bowl. The chill time, however, is what takes the longest.
- Consistent Texture: No-knead dough has a uniform texture that is easy to handle and shape.
Cons
- Long Chill Time: This is a dough you make when you know you want to have pizza in the next day or two. It takes 24 hours of chill time in the refrigerator for the dough to finish rising and developing gluten, but you save your arm strength that would have been spent kneading.
- Lack of Control: With the no-knead dough, the gluten develops naturally. Since this occurs in the refrigerator, there is a risk of under or over-development. Check on the dough frequently.
- Can Rise Poorly: Dough that isn’t kneaded may not rise well when baked. I use a combination of proofing the initial dough outside the refrigerator, deflating and shaping it in the bowl, and finishing the rise in the fridge. As the dough comes to room temperature as you stretch it, it will continue to rise. I split the no-knead dough in half for the recipe video and saved one portion for another night. I still got a 12″ thin-crust pizza that ended up rising more than expected, which I attribute to my approach (toot toot).
Ingredient Notes: Dough
- Active Yeast: Active yeast is used to help the dough rise. Check the expiration date on your yeast to ensure it is still active before using it. If you use instant yeast instead, whisk all ingredients together (except the water and oil at this point). Pour the warm water into the mixture, and stir until most of the flour is incorporated. Add the oil, and finish mixing to create a shaggy dough.
- Granulated Sugar: Sugar is used in pizza dough to feed the yeast, helping it to grow and multiply. This leads to a better rise and a lighter texture.
- Bread Flour: Bread flour is a high-protein flour designed explicitly for yeast-based baked goods like pizza dough. It gives the dough a chewy, crusty texture that is perfect for pizza. Ideal hydration for bread dough is around 75%, and if you’re using all-purpose flour instead, aim for 70% hydration. To achieve this, use the same flour weight, but cut the water to under a cup. Then, add up to 2 Tbsp of flour in the kneading process.
- Basil: Basil adds a subtle herbal flavor to the pizza dough. You can use fresh or dried basil, depending on what you have. One tablespoon of fresh basil = One teaspoon of dried basil, but feel free to experiment with other herbs.
- Minced Garlic: Minced garlic adds a delicious flavor to the dough, but it can be skipped if you’re not a fan.
- Kosher Salt: Salt is essential in pizza dough as it helps to control the yeast and enhance the flavor. Use kosher salt, which has a coarser texture and a more distinct flavor than regular table salt. Fine sea salt also works well.
- Extra Virgin Olive Oil: EVOO is added to the dough to give it a rich flavor and a tender texture. Add it toward the end of the mixing process, which prevents oil from repelling the water and impacting texture.
Tips for Spreading the Crust
- Let the dough come to room temperature before stretching it.
- Do not roll out the dough with a rolling pin. This will pop any air pockets in the dough and create a dense crust.
- Stretch the dough with oiled fingers on an oiled pan, not flour. This will contribute to the crust’s crispiness, and you’ll avoid adding too much flour, which can make it rigid and dry.
- Use your fingertips to press into the center of the dough and create an outer crust edge (see the image below). Once there is enough space in the center of the dough, start incorporating the outer edges of your hands to stretch the dough gently. Stretch the dough by slowly pulling your hands apart, but not with too much force that the dough tears. Finish stretching the dough with your fingertips, as this will help create air pockets, resulting in a delicious underside to the crust.
- If you stretch the dough and it won’t hold shape, wait 10 minutes and allow it to rest before continuing to try. The gluten will relax, and you can continue stretching. Repeat as necessary until you reach the desired shape.
- If the dough tears, pinch any holes closed with surrounding dough and then flatten with your palm.
- If you plan on using a pizza stone or steel, I recommend stretching the dough out on lightly floured parchment paper (no oil). Trim the parchment paper slightly larger than the pizza size for baking on the steel/stone.
See? Homemade pizza dough IS easy.

Tips for Baking Pizza
- Use a nonstick pizza pan, ideally one with ridges (not holes) that will help to create air pockets, add texture, and brown the underside. This recipe calls for setting your oven to 450°F / 232°C, so the pan used would need to work with that heat.
- Set your oven rack to the lowest level. Heat comes from the bottom, and baking the pizza on the lowest rack will help to brown the crust while not burning the top.
- Pre-bake your pizza crust before you add any toppings–it takes about 4 minutes at 450°F / 232°C. This helps jump-start the browning of the underside while also ensuring you don’t end up with a soggy crust from adding too many toppings. The dough will have a matte finish when it is done pre-baking, but it will still be very soft.
- Don’t put raw/uncooked items such as chicken, beef, or bacon on a pizza. Precook those items before using them. The goal is to bake the pizza quickly, so any toppings that will take a while to cook should be handled ahead of time (I’m looking at you, caramelized onions).
- If you use a sauce like the one with this recipe, cook it ahead of time to simmer the flavors together and get the best result. Throwing raw sauce on a pizza is fine, but the depth of flavor will not be there in the final product due to the lack of simmering the flavors together.
- You can apply sauce to the whole pizza, but dotting it on the surface instead, interspersed with the toppings, will prevent a soggy crust while allowing other flavors from the toppings to shine.
- For additional baking tips, peruse my FAQ page.
Using a Pizza Stone
If you’re using a pizza stone or steel:
- Preheat the stone or steel in the oven.
- Stretch the dough on a sheet of high-heat parchment paper (425°F / 218°C or higher), and trim the paper to just larger than the pizza size. Slide the pizza onto the stone/steel with the parchment underneath, and cook for 2-3 minutes. Remove the pizza with parchment and add toppings before placing back on the stone/steel. Since the pizza does not cook for an extended amount of time and the size of the parchment paper is slightly larger than the pizza, the paper should stay intact. But keep an eye on it since parchment can catch fire if the oven is set too high and the parchment stays in for an extended period. [Do not broil with parchment paper!!]
Why San Marzano Sauce?
San Marzano tomatoes, named after the region in Italy where they’re grown, are preferable for making Marinara and pizza sauce (which is similar in flavor but has a thicker texture). They are a type of plum tomato that is sweeter with fewer seeds and less acidity. The region’s unique growing conditions make a San Marzano tomato so flavorful. Still, there are many “San Marzano-style” versions out there with tomatoes grown in the US, as Martha Stewart describes on her blog. An authentic San Marzano tomato is marked by a DOP-certified seal (Denominazione d’ Origine Protetta), which tells you that it is grown in a particular region.
San Marzano-style versions will still contribute to a delicious sauce–I’m just a stickler for authenticity! This homemade pizza dough is so easy to make as it is, especially the no-knead version if you plan, so why not pair it with a robust sauce that takes only minutes of prep but yields incredible results?
Ingredient Notes: Hearty San Marzano Sauce
- Extra Virgin Olive Oil: This ingredient facilitates combining flavors as the sauce cooks and adds a distinct, enhancive flavor.
- San Marzano Tomatoes: See the previous section for my soapbox.
- Sweet Onion: Sweet onions are used in this recipe for their mild flavor and natural sweetness. They help to balance the acidity of the tomatoes and contribute to the overall sweetness of the sauce.
- Garlic Cloves: Garlic cloves add a bold, savory flavor to the sauce that complements the onions and tomatoes.
- Oregano and Basil: Oregano and Basil are classic herbs often used in Italian cuisine, including pizza sauce. They add a warm and fresh herbal flavor that complements the sauce’s sweetness.
- Kosher Salt: Salt is essential in pizza sauce as it helps to bring out the flavors of the other ingredients and balance the sweetness.
- Celery Seed: Celery seed adds a subtle, earthy flavor to the sauce. It pairs well with the other ingredients.
- Sugar: Sugar is used in this recipe to balance the acidity of the tomatoes and complement the savory flavors.
- White Pepper: White pepper adds a subtle, spicy kick to the sauce.

Storage
This homemade pizza dough is easy to make, so prepare extra for storage! Pizza dough can last up to 3 days in the refrigerator in an airtight container. It can last up to a month frozen if wrapped in plastic wrap.
Homemade pizza sauce can last up to 5 days in the refrigerator in an airtight container (and longer if appropriately canned).

Knead vs. No-Knead - Easy Homemade Pizza Dough 2-Ways w/ San Marzano Sauce
Equipment
- Mixing Bowls
- Measuring Cups/Spoons
- Wooden Spoon
- Whisk
- Dough Scraper or Rubber Spatula
- Digital Scale optional
- Stand Mixer optional
- Large, High-walled Skillet Pan with Cover or Dutch Oven if making sauce
- 14" or 16" circular Pizza Pan or Half Sheet Pan
Ingredients
Dough
- 2 Tsp Active Yeast 8g
- 2 ½ Tsp Granulated Sugar 10g
- 1 Cup + 1 Tsp Warm Water 105-115°F / 40-46°C - 240mL
- 2 ½ Cups Bread Flour plus more for dusting - 300g
- 1 ¼ Tsp Kosher Salt 7.5g
- 2 Garlic Cloves minced - 6g
- ¾ Tsp Dried Basil or 1 ½ Tsp Fresh Basil - 0.75g
- 1 Tbsp Extra Virgin Olive Oil or Light Olive Oil - 14g
Hearty San Marzano Pizza Sauce, if using
- 3 Tbsp Extra Virgin Olive Oil or Light Olive Oil - 42g
- 1 28oz Can San Marzano Tomatoes 793g
- ½ Large Sweet Onion finely diced - 165.5g
- 3 Garlic Cloves peeled and thinly sliced - 9g
- ½ Tsp Kosher Salt 3g
- ¾ Tsp Dried Basil 0.75g
- ¾ Tsp Dried Oregano 0.75g
- ¼-½ Tsp Red Pepper Flakes to taste - 0.5g
- ¼ Tsp Celery Seed 0.5g
- 6 Tbsp Tomato Paste or ½ of a 6oz can - 96g
- 2 Tsp Granulated Sugar 8g
- ¼ Tsp White Pepper 0.5g
OPTIONAL: Topping Suggestion #1
- 1-2 Tbsp Extra Virgin Olive Oil 14-28g
- ½-1 Cup Hearty San Marzano Pizza Sauce 122g
- 4 oz Low Moisture, Whole Milk Mozzarella thinly sliced - 113g
- 4 oz Uncured Pepperoni thinly sliced - 113g
- ¼ Cup Shaved Parmesan Cheese 25g
- ¼ Tsp Garlic Salt 0.5g
OPTIONAL: Topping Suggestion #2
- ¼-½ Cup Hearty San Marzano Pizza Sauce 61-122g
- ¼-½ Cup Basil Pesto 62-124g
- 4 oz Low-Moisture, Whole Milk Mozzarella thinly sliced - 113g
- 4 oz Soppressata Italian Dry Salami thinly sliced - 113g
Instructions
Preparing the Dough: Knead & No-Knead Versions
- Add sugar and yeast to a large mixing bowl. Add the warm water and whisk for 10-15 seconds until the yeast and sugar are mostly dissolved. Let rest for 10 minutes or until the yeast blooms across the water's surface. It should look like a thin layer of foam.
- Add the flour, salt, garlic, and basil to the center of the yeast mixture. Using the handle of a wooden spoon, stir the mixture from the center. Continue mixing and incorporating the dry ingredients into the yeast mixture until a shaggy dough begins to form and only a few streaks of flour remain, about 30-60 seconds.
- Add the olive oil and continue mixing the dough until combined and the remaining flour is incorporated, about 30-60 seconds more.
Kneaded Version
- Lightly flour a clean work surface with 2 tsp of flour. Scrape the dough out of the bowl onto the surface, and sprinkle 1 tsp of flour over the dough. Flour your hands, and shape the dough into a rough rectangle.
- Kneading method: Pull the end of the dough furthest away from you and place it on top of the end closest to you, essentially folding the dough in half. Press the seam gently together with the palms of your hands.Rotate the dough 90° and repeat, again pulling the end of the dough furthest away from you and placing it on top of the end closest to you. Press the seam gently together with the palm of your hands.Rotate the dough 90° and repeat the process for 5 minutes, lightly flouring the work surface as needed to keep the dough from sticking as you turn it. The dough should spring back when you press on it when the 5 minutes is up, and it should feel tacky but not stick to your hands. Tips: Keep your hands lightly floured as you work with the dough, especially at the beginning of the kneading process, since it will be sticky. If your hands get covered in too much dough, rub your hands together with some flour (a flour wash) to remove the dough parts. I like to sprinkle extra flour on the sidelines of my work surface for quick access. With this recipe, you should not add more than 2 Tbsp of flour to the dough during the kneading process to achieve 75% hydration.
- Using the outer edges of your hands, shape the dough into a ball as you rotate it while pressing in gently. The dough should tighten with each rotation until it becomes relatively smooth.
- Lightly oil a large bowl and place the dough inside, smooth side down, to coat with oil. Flip the dough and cover the underside with oil. Cover the bowl with a damp tea towel or plastic wrap, and place it in a warm spot--about 77-82°F. Let the dough rise until doubled in size, about 60-90 minutes. To test that it is done, press a floured finger gently against the dough. It should indent but slowly spring back.Alternatively, you can let the dough rise in the fridge, covered, for up to 72 hours.
- When ready to make pizza: Preheat the oven to 450°F / 232°C and place a rack in the lowest position. Let the dough come to room temperature if refrigerated prior.
- Lightly oil a non-stick pizza pan or half-sheet pan that can withstand 450°F / 232°C or higher temperatures. Place the dough in the center, and press into the center of the dough with oiled fingertips. Continue pushing around the center and toward the edge while creating a lifted outer crust.
- Begin using a combination of your fingertips and the outer edges of your hands to stretch the dough, focusing on thicker areas while always maintaining a raised outer edge (unless opting for a thin crust). Your hands should gently pull away from each other as you press into the dough to stretch the gluten. If the dough tears at any point, pinch the dough together to mend the hole.
- If the dough snaps back and won't hold shape, wait 10 minutes to allow the gluten to relax before stretching it further. Repeat as necessary until you reach the desired shape. The dough should be adequate for a regular 14", half-sheet pan, 16" thin crust, or two really thin 10-12" pizzas.
- Place the pan in the oven for 4 minutes to pre-bake the crust. Next, add toppings, and continue baking on the lowest rack until the crust edges and underside are golden brown, about 14-18 minutes. Let cool for 5 minutes before moving the pizza to a cutting board to cool for an additional 5-10 minutes.
No-Knead Version
- Once the dough is mixed, cover the bowl with a damp tea towel or plastic wrap, and place it in a warm spot--about 77-82°F. Let the dough rise until doubled in size, about 60-90 minutes.
- While still in the bowl, use a dough scraper or rubber spatula to grab and lift under one side of the dough, stretching it over itself and placing the raised portion on the top center. Rotate the bowl, and repeat the process 3-4 times. The goal is to deflate the dough while also shaping it into a rough ball form. (See video for a visual)
- Cover the bowl with plastic wrap or an airtight cover and place it in the refrigerator for at least 24 hours, up to 72 hours.
- When ready to make pizza: Preheat the oven to 450°F / 232°C and place a rack in the lowest position.
- Sprinkle 1-2 tsp of flour on a clean work surface. Place the cold dough on the surface and sprinkle an additional ½ teaspoon over it. With floured hands, deflate the dough and shape it into a rough rectangle. Pull the end of the dough furthest away from you and place it on top of the end closest to you, essentially folding the dough in half. Press the seam gently together with the palms of your hands.Rotate the dough 90° and repeat, again pulling the end of the dough furthest away from you and placing it on top of the end closest to you. Press the seam gently together with the palm of your hands. Repeat once more for a total of 3 times. You shouldn't need more flour than stated since cold dough is easier to work with.
- Using the outer edges of your hands, shape the dough into a ball as you rotate it while pressing in gently. Place the dough into a bowl and allow it to come to room temperature.
- Lightly oil a non-stick pizza pan or half-sheet pan that can withstand 450°F / 232°C or higher temperatures. Place the dough in the center, and press into the center of the dough with oiled fingertips. Continue pushing around the center and toward the edge while creating a lifted outer crust.
- Begin using a combination of your fingertips and the outer edges of your hands to stretch the dough, focusing on thicker areas while always maintaining a raised outer edge (unless opting for a thin crust). Your hands should gently pull away from each other as you press into the dough to stretch the gluten. If the dough tears at any point, pinch the dough together to mend the hole.
- If the dough snaps back and won't hold shape, wait 10 minutes to allow the gluten to relax before stretching it further. Repeat as necessary until you reach the desired shape. The dough should be adequate for a regular 14", half-sheet pan, 16" thin crust, or two really thin 10-12" pizzas.
- Place the pan in the oven for 4 minutes to pre-bake the crust. Next, add toppings, and continue baking on the lowest rack until the crust edges and underside are golden brown, about 14-18 minutes. Let cool for 5 minutes before moving the pizza to a cutting board to cool for an additional 5-10 minutes.
Hearty San Marzano Sauce
- Place a large, high-walled skillet on your stove burner over medium heat. Add the olive oil and heat until shimmering. While the oil heats, use kitchen sheers to cut the San Marzano tomatoes. If you don't have kitchen sheers, crush them with your hands.
- Add the onions and stir together with the oil. You should hear simmering. Cover the pan and cook undisturbed for 2 minutes.
- Stir in the garlic, salt, basil, oregano, celery seed, and red pepper flakes. Cook, continuously stirring, for 1 minute. Do not add the white pepper at this point.
- Add the tomatoes, tomato paste, and sugar. Stir until combined, and occasionally stir until the sauce bubbles. Turn the heat to low, and cover the pan.
- Continue simmering the sauce over low heat for 20-30 minutes until thickened, stirring occasionally. Some of the liquid will evaporate, and you should be able to drag a rubber spatula through the sauce and see pristine trails left behind. The sauce should be very lightly simmering/bubbling, so I recommend using the smallest burner at the lowest setting for this step and adjusting from there.
- Stir in the white pepper. Test the sauce and season to your taste preferences. Let the sauce cool for 10 minutes before using. For a smooth sauce, pour it into a blender and pulse until you reach the desired consistency. Refrigerate leftovers in an airtight container for up to 5 days.
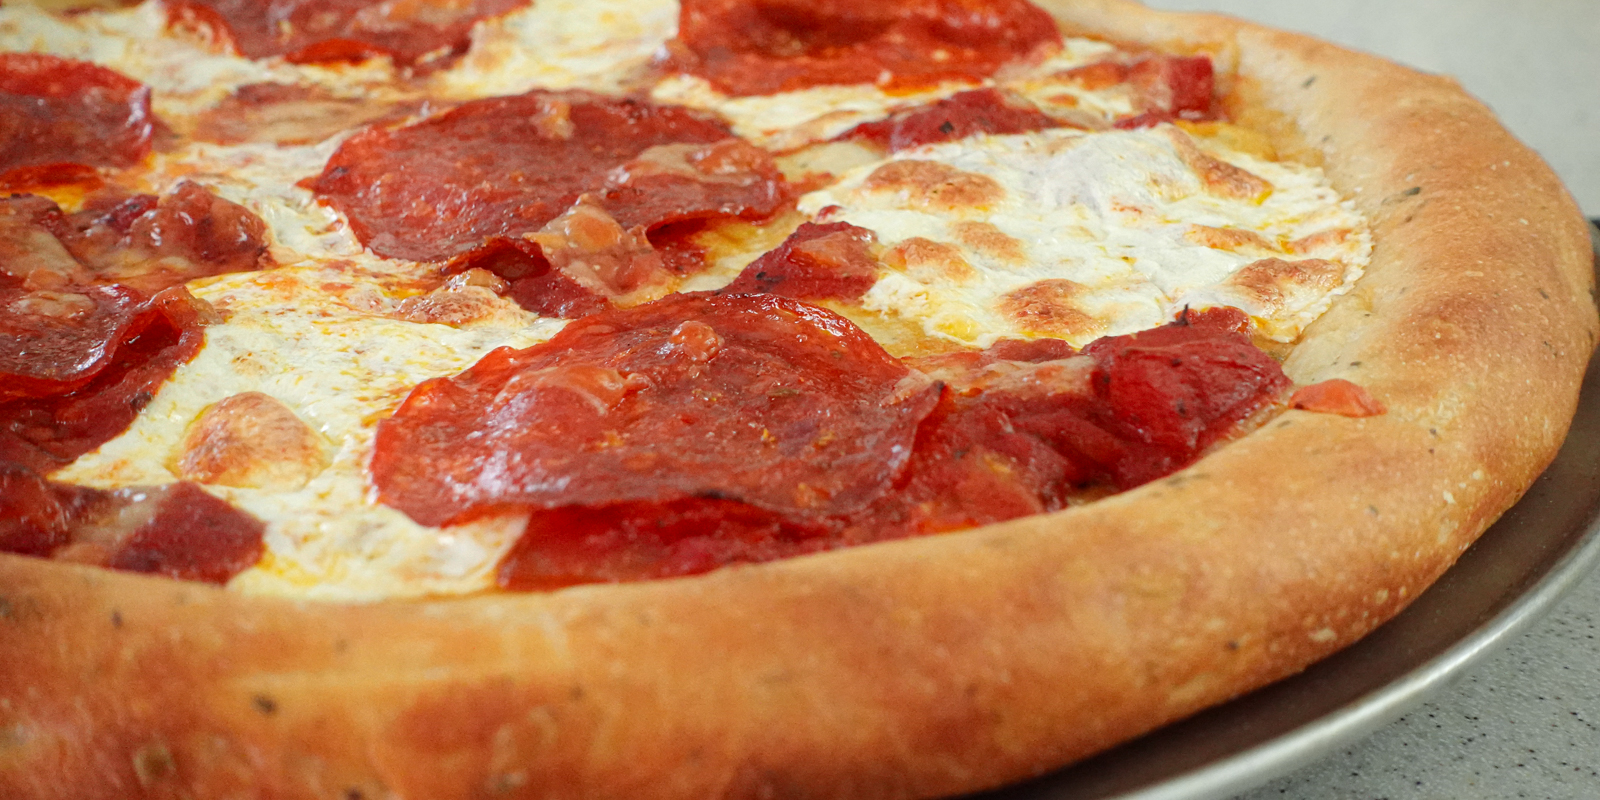
OPTIONAL: Topping Suggestion 1
- Drizzle olive oil over the pre-baked crust and spread it around. Dot the crust with the sauce. Lay the mozzarella over the sauce. Lay the pepperoni over the mozzarella. Place the parmesan shavings on top, and sprinkle garlic salt over the pizza. Bake on the lowest rack until the crust edges and underside are golden brown, about 14-18 minutes.
OPTIONAL: Topping Suggestion 2
- Dot the pre-baked crust with pesto. Dot the crust with the sauce. Lay the mozzarella over the pesto/sauce. Lay the Soppressata over the mozzarella. Bake on the lowest rack until the crust edges and underside are golden brown, about 14-18 minutes.